Mat Cut Calculator
Plan a single-window mat with window opening plus exact mat-cutter guide-bar settings
Overview
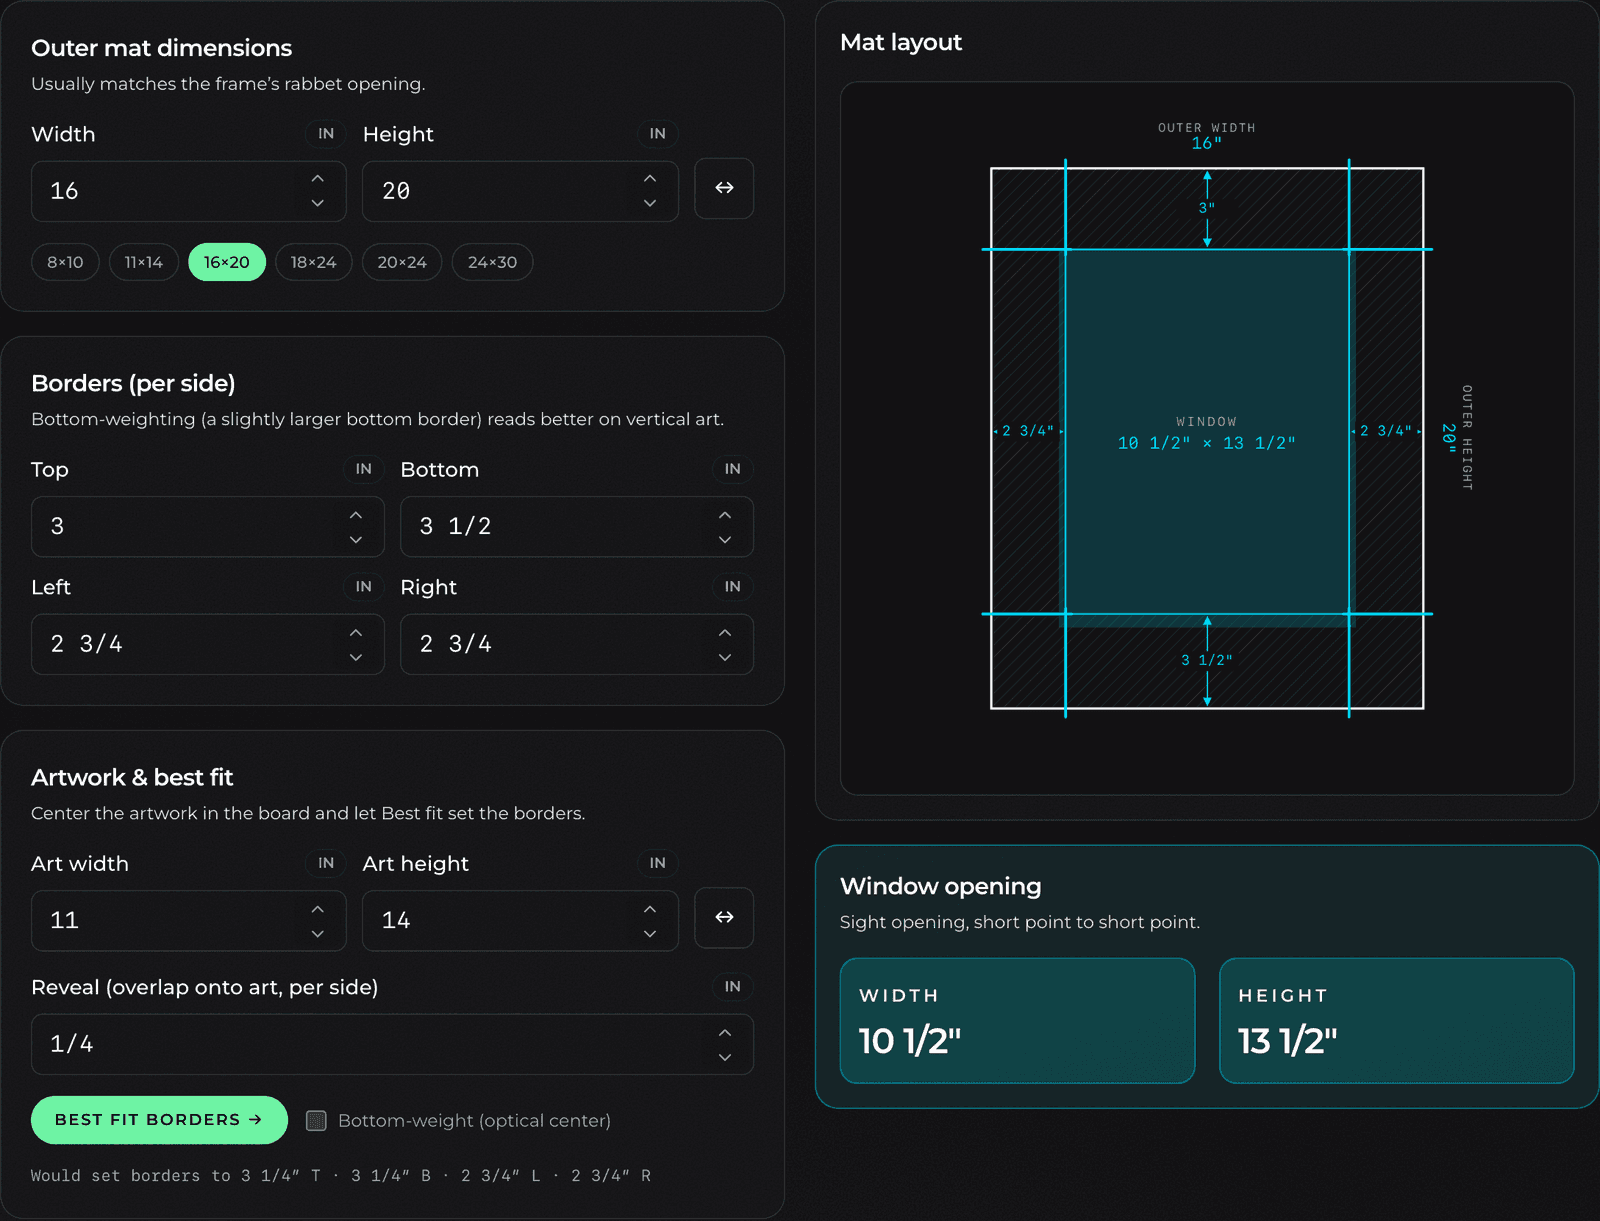
The mat cut calculator plans a single-window overmat for a framed print. You enter the outer board size and the border you want on each side (or let the calculator fit the borders to your artwork), and it returns the window opening plus the offset, plunge, and stop settings to dial into a mat cutter. Everything is measured the way you measure at the cutting board, in inches, as decimals or fractions, so what you read here is what you set on the bar.
Features
- Window opening (sight opening) calculated from the outer board and your four borders
- Cutter guide-bar settings: offset, plunge, and stop for all four cuts, ready to take to the cutter
- Independent per-side borders, with a flip control to swap orientation
- Common board-size presets (8×10, 11×14, 16×20, 18×24, 20×24, 24×30)
- Best fit borders that center your artwork in the board automatically
- Bottom-weighting for optical centering on vertical work
- Reveal handling so the mat overlaps the paper edge by a known amount
- A live mat-layout diagram and an all-dimensions summary
- Fraction-friendly input: type
1.5,1 1/2, or1/4
Terminology
- Overmat (mat board): The card window that sits on top of the print inside the frame. The outer dimensions usually match the frame's rabbet opening.
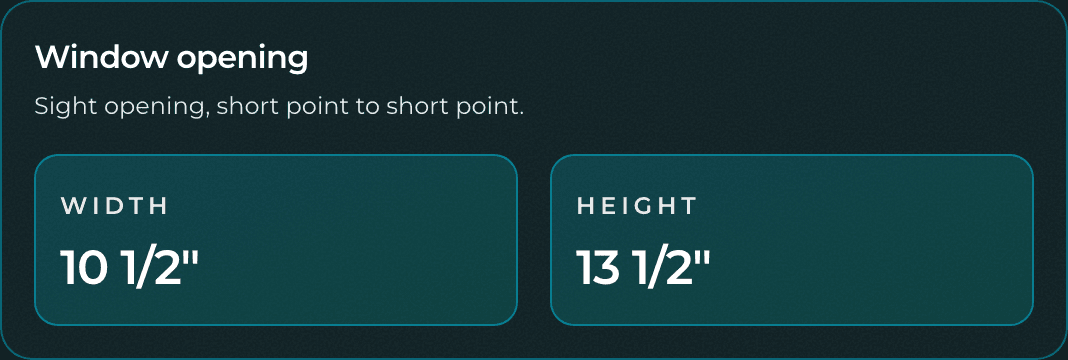
- Window (sight opening): The hole cut in the mat that you see the artwork through. It is measured short point to short point: the smallest dimension of the bevel opening, which is what you actually see.
- Border: The distance from the outer edge of the board to the window edge, on a given side. Each of the four sides is set independently.
- Reveal: How far the mat overlaps onto the artwork on each side, so the window hides the raw paper edge. Typically 1/8" to 1/4" per side.
- Bottom-weighting: Adding a little extra to the bottom border so the window sits at the optical center rather than the geometric center. Vertical art "drops" otherwise.
- Guide bar: The fence on a mat cutter that the board edge rides against. The offset is the border for the edge set against the bar; the plunge and stop are where you start and end each cut.
Basic Usage
- Enter the outer mat dimensions (usually the frame's rabbet opening), or pick a board preset.
- Set each border (top, bottom, left, right), or use Best fit to center your artwork.
- Read the window opening; this is the sight opening you'll see through the mat.
- Take the guide-bar settings below to your mat cutter and cut the board face down.
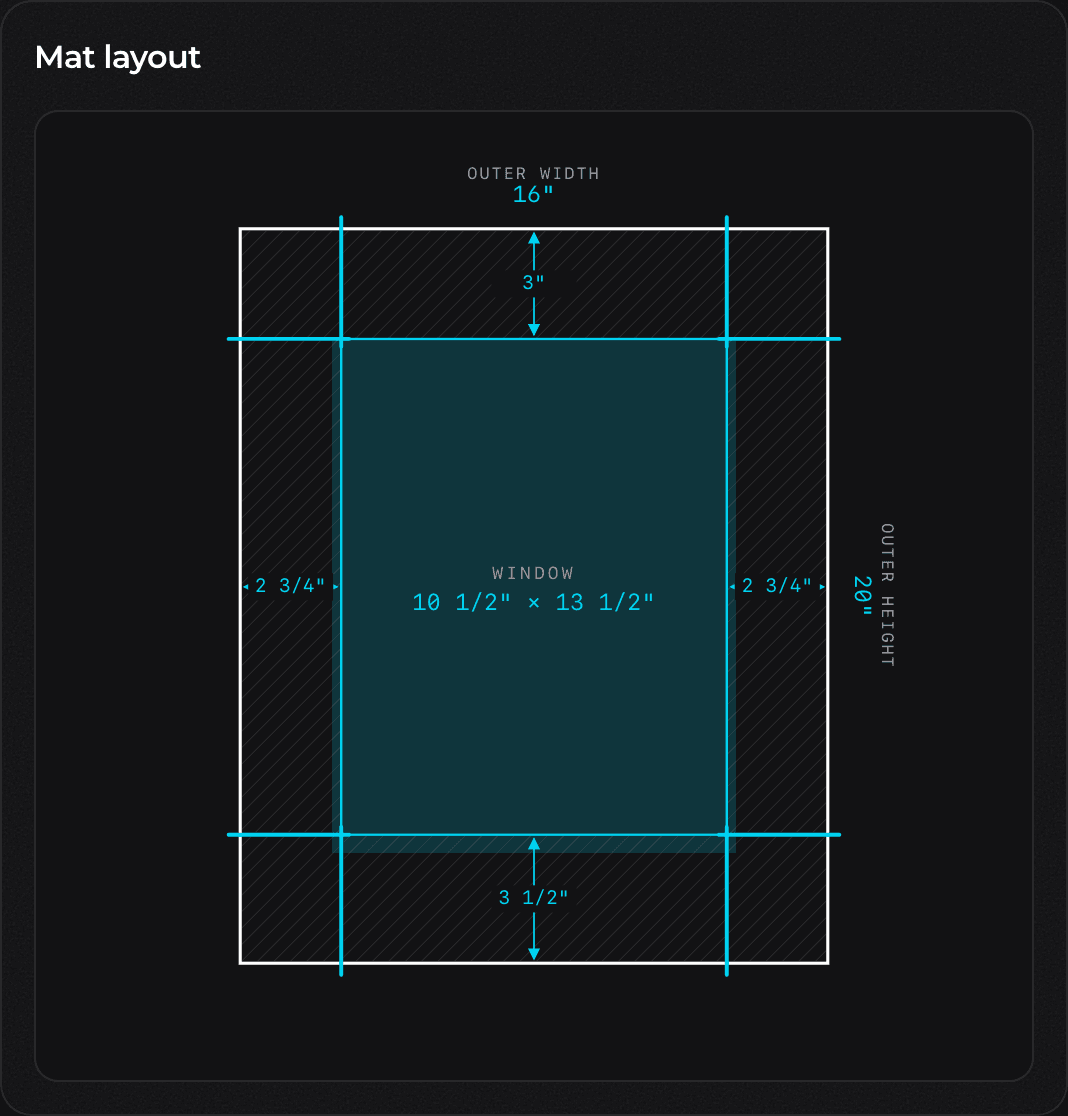
The diagram shows the board, the window, and each border labelled, so you can sanity-check the layout before you cut. The window opening is also called out on its own:
Important Notes
- Cut face down. The guide-bar offset is the border for the edge you set against the bar, so the settings below assume the board is face down on the cutter.
- The window is reported short point to short point, the visible opening. With a bevel cutter, the back of the cut is slightly larger; overshoot each plunge and stop a touch to let the bevel reach the corner, and always test on a scrap first.
- Borders must leave a window larger than zero on both axes. If the outer board is too small for the borders you entered, the calculator flags it and the readouts blank out until the numbers are valid.
Advanced Usage
Cutter Guide-Bar Settings
This is the panel you actually work from at the cutter. Each of the four window edges gets its own card with three numbers: the guide bar offset (the border for the edge against the bar), where to plunge (start the cut), and where to stop. Each card also tells you which edge to set against the bar.
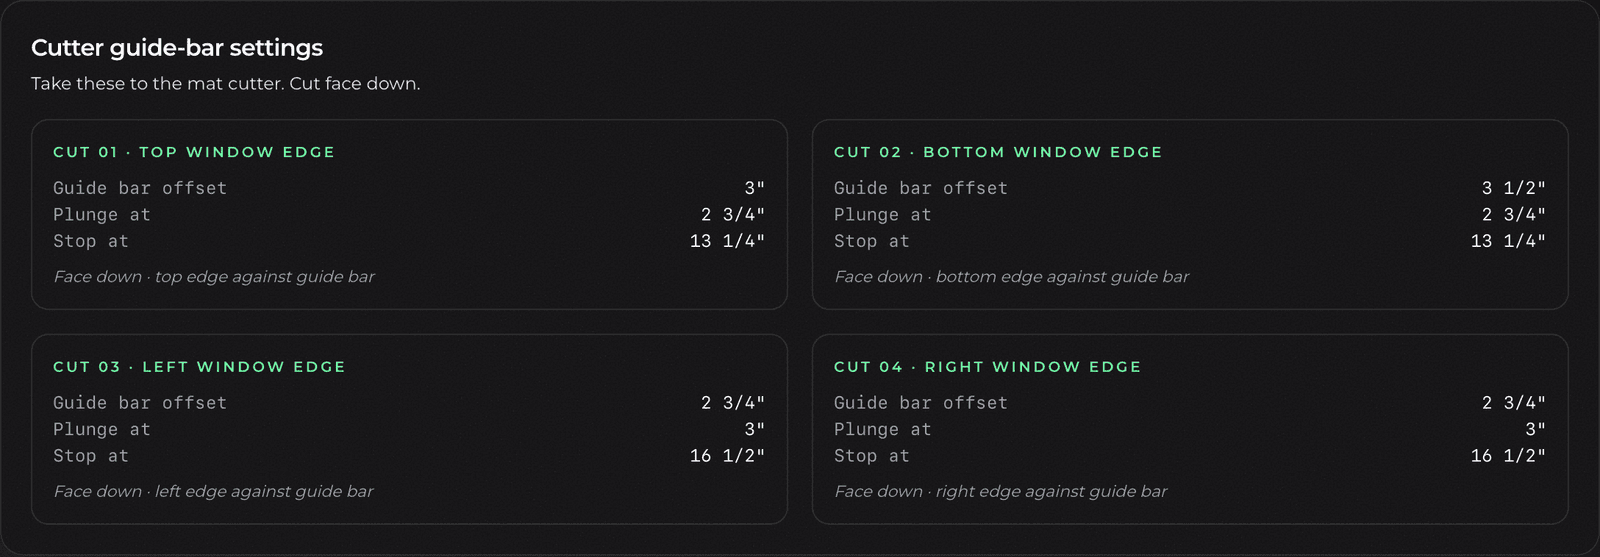
Work through the four cuts in order, repositioning the board against the bar for each edge. Because the offset equals the border on the side against the bar, you can verify each setting against the borders you entered.
Best Fit Borders
If you know your artwork size but not the borders, enter the art width and height and click Best fit borders. The calculator centers the artwork in the board and fills in all four borders for you. It previews the result first ("Would set borders to…") so you can see the numbers before committing.
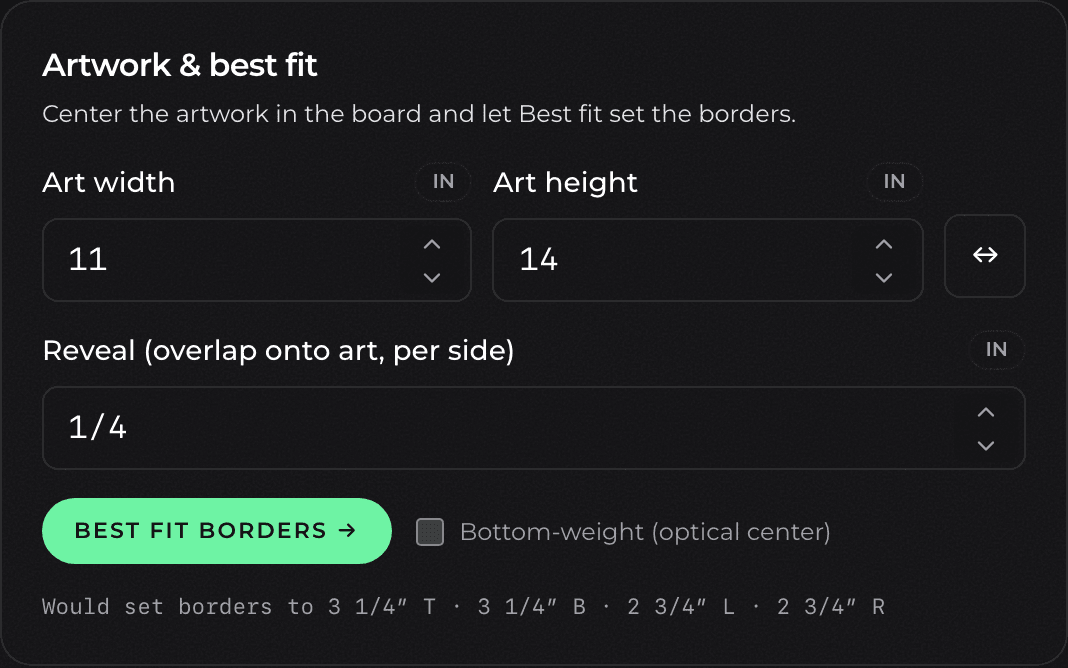
Best fit accounts for your reveal and respects bottom-weighting when that option is on. If the artwork plus reveal can't fit inside the board, the button stays disabled.
Bottom-Weighting
Geometric centering looks bottom-heavy to the eye: a perfectly centered window appears to sag. Tick Bottom-weight (optical center) to add a little extra to the bottom border so the window sits where the eye expects it. The extra amount scales with the total vertical border (roughly 1/4" up to a full 1" on large mats). This applies when you use Best fit.
Reveal and Artwork
The reveal is how far the mat laps over the artwork on each side. Set it (1/4" is typical) so the window is slightly smaller than the print and the cut edge of the paper stays hidden. When you provide an artwork size, the all-dimensions summary reports the actual reveal the current window produces, and warns you if the window doesn't match the reveal you asked for. This helps when you've hand-entered borders rather than using Best fit.
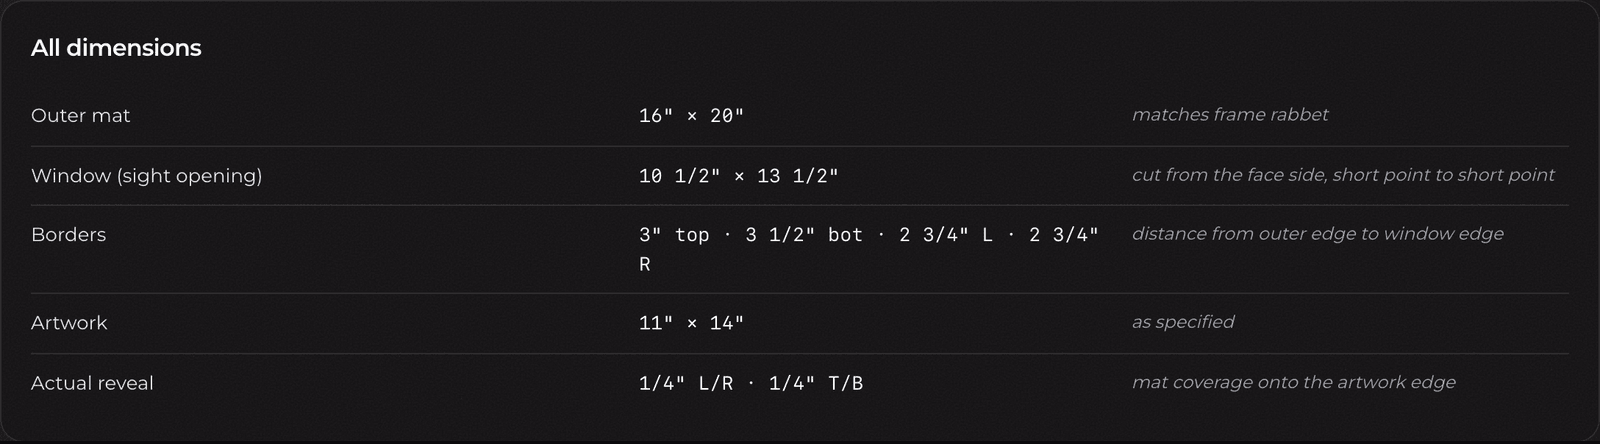
The all-dimensions panel gathers everything in one place: outer board, window opening, the four borders, and, when you've entered artwork, the artwork size and the actual reveal onto each edge.