Border Calculator
Calculate the exact easel blade placement for your darkroom prints
Overview
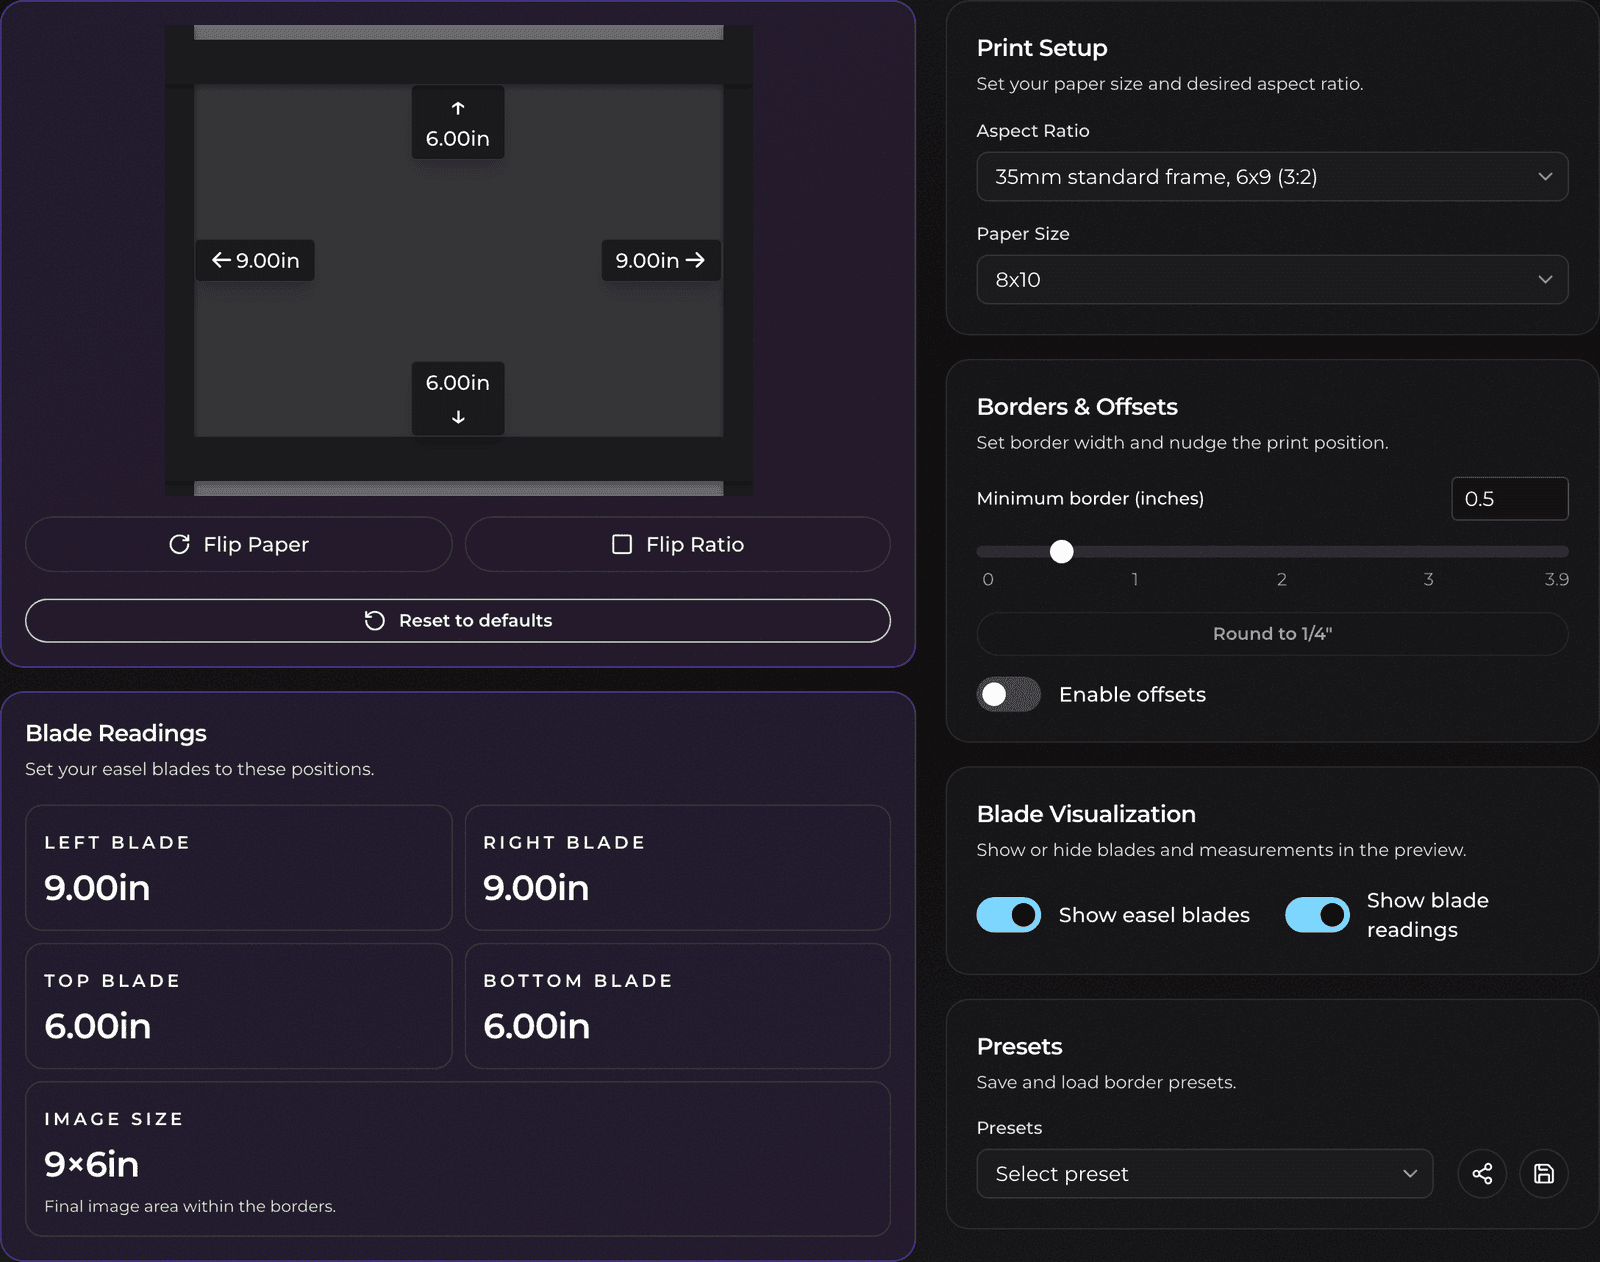
The border calculator helps you determine the optimal placement of your enlarger easel blades when printing photos, ensuring consistent aspect ratios in your prints from your negatives, and aesthetically pleasing borders.
Features
- Border determination based on desired minimum border width
- Live preview of the print on the easel
- Optional viewing of visualized blades and viewing the blade readings on the print preview itself.
- Standard aspect ratios for common film negative sizes (3:2, 4:5, 1:1, etc)
- Custom Aspect Ratios for more complex, non-predefined aspect ratios
- Standard paper sizes for common photo paper sizes (8x10, 11x14, 16x20, etc.)
- Custom/Non-Standard Paper Sizes for custom cut paper or paper sold in sizes that don't have a standard easel slot
- Quarter Inch Rounding, to account for the quarter inch increments on most easels
- Offsets, to shift the image from center
Terminology
- Easel: The device you place your paper into to print on.
- Usually amber or yellow, for some reason, but likely to prevent glare from the light source (paper is not sensitive to amber/red light).
- Blade: The four black strips of metal that cover your paper on the easel to create clean borders.
- Aspect Ratio: The ratio of the width to the height of the image.
- For example, a 3:2 aspect ratio means the width is 3 units and the height is 2 units.
- 3:2 is the standard aspect ratio for 35mm camera negatives.
- Paper Size: The size of the photo paper you're printing on.
- For example, an 8x10" paper size means the width is 8 inches and the height is 10 inches, though easels are horizontally oriented, so you will likely be printing with the 10" side as the width.
- Minimum Border Width: The minimum width of the border you want to print.
- For example, if you want the your print to have at least a 1" border, you would set the minimum border width to 1".
- Offset: The amount to shift the image from center.
- For example, if you want to shift the image 1" to the right, you would set the offset to 1".
Basic Usage
- Select your desired aspect ratio (the ratio of your negative or image)
- Choose your paper size (the size of photo paper you're printing on)
- Set your minimum border width (at least 0.5" recommended)
- Optionally enable offsets to shift the image from center
- View the blade positions in the results section or on the print preview if you have Show Blade Readings enabled.
- Enter the blade positions into your enlarger's blade adjustment mechanism.
Important Notes
The measurements shown are distances from the edge of your enlarger baseboard to where each blade should be positioned relative to the inside edge of the blade. For non-standard paper sizes (custom cut paper, or paper sold in sizes that don't have a standard easel slot), follow the instructions presented by the calculator to place your paper in the appropriate easel slot.
Some easels have better markings than others, but regardless of your easel, this calculator should at minimum provide a starting point for your blade placement.
Advanced Usage
There are a number of features in the border calculator that are useful for more advanced users.
Offsets
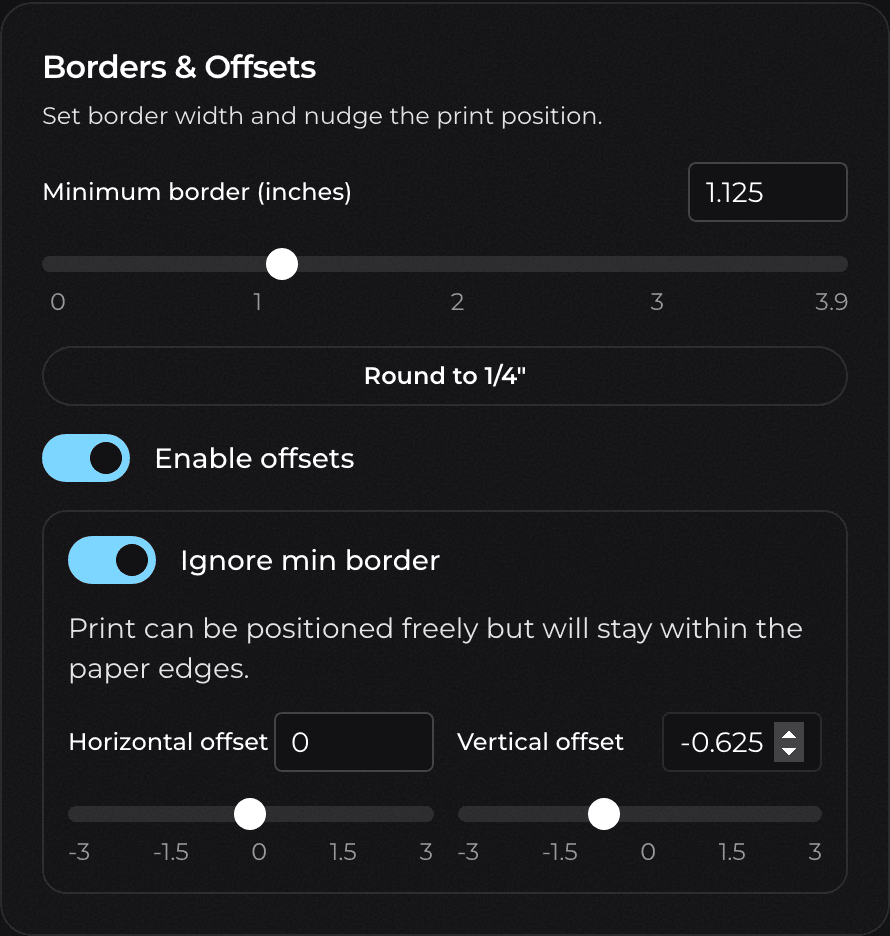
The offsets feature allows you to shift the image from center. This is useful for when you want to print an image with a border that is not centered.
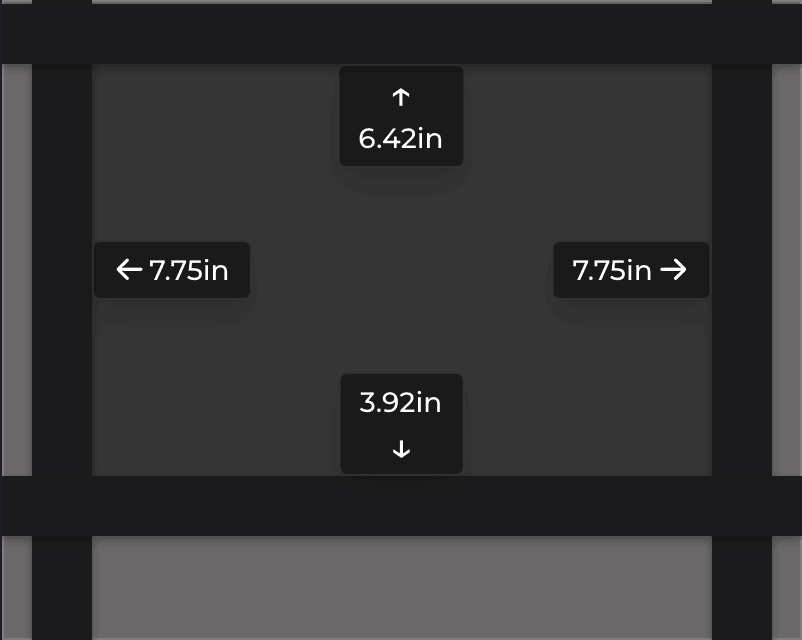
For example, if you want to place the image on the upper portion of the paper, you can adjust the vertical offset to be negative:
Which will create a blade positioning result like this:
Non-Standard Paper Sizes
The calculator supports entering custom paper sizes. For example, if you want to cut a 8x10" sheet of paper into an 8x8" sheet, you can enter the following:
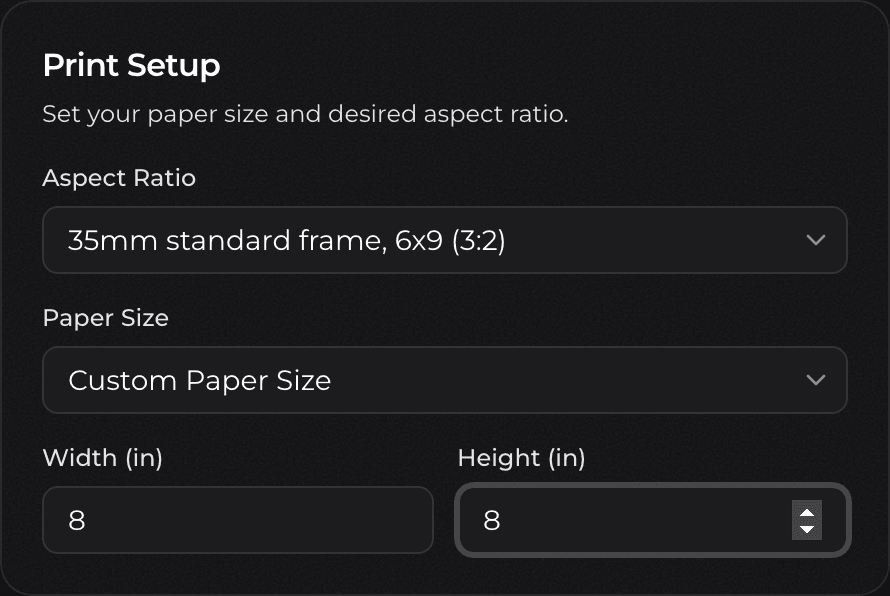
Which will create a blade positioning result like this:
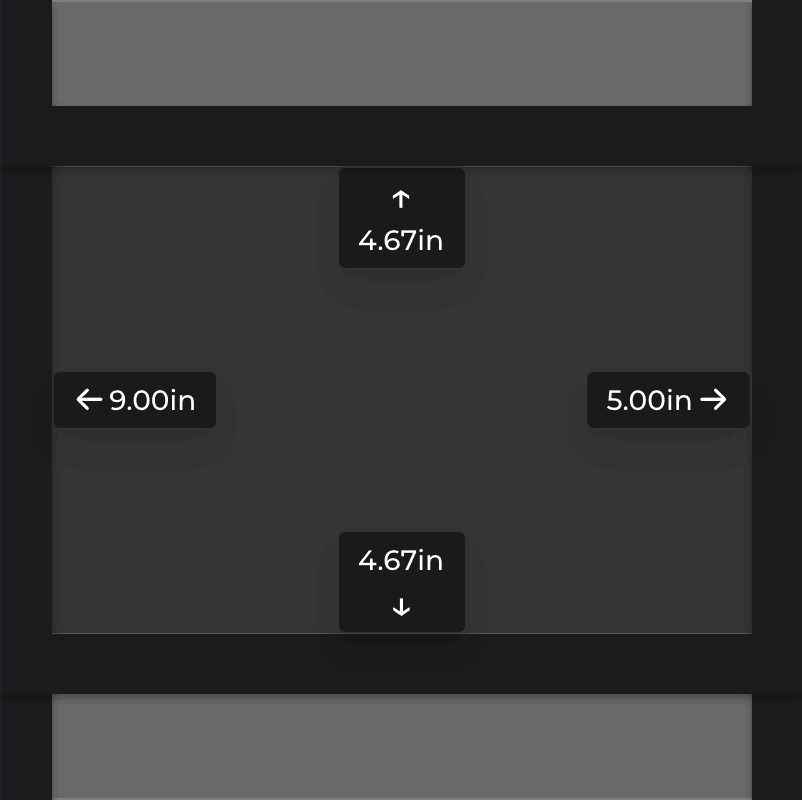
Notice that the calculator will recommend placing the paper in the 8x10" easel slot, as it automatically detects the nearest easel paper slot it will fit into, and will adjust the blade positions to account for the paper size, as well as instructing you to place the paper in the easel slot all the way to the left.
Quarter Inch Rounding
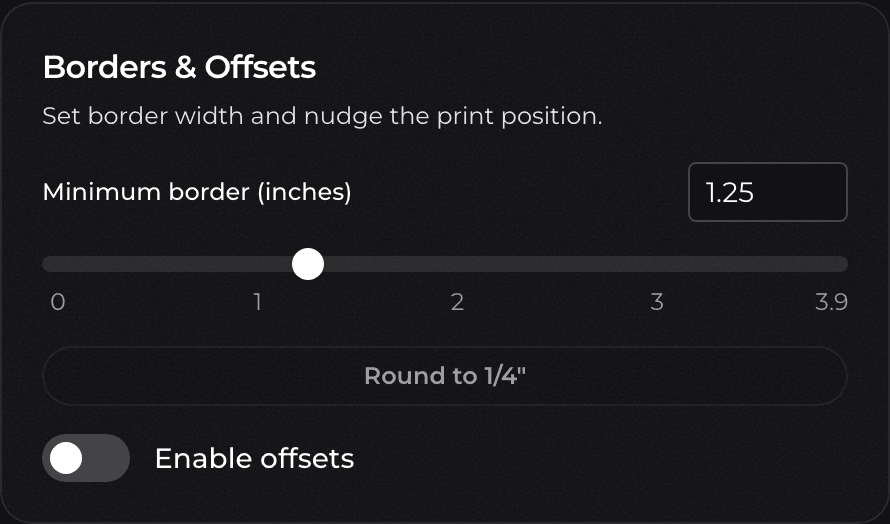
This button will round the blade positions to the nearest quarter inch (or closest approximation to quarter inch). This is especially helpful, since almost all easels have markings in quarter inch increments.
This button will always round down to the nearest quarter inch.
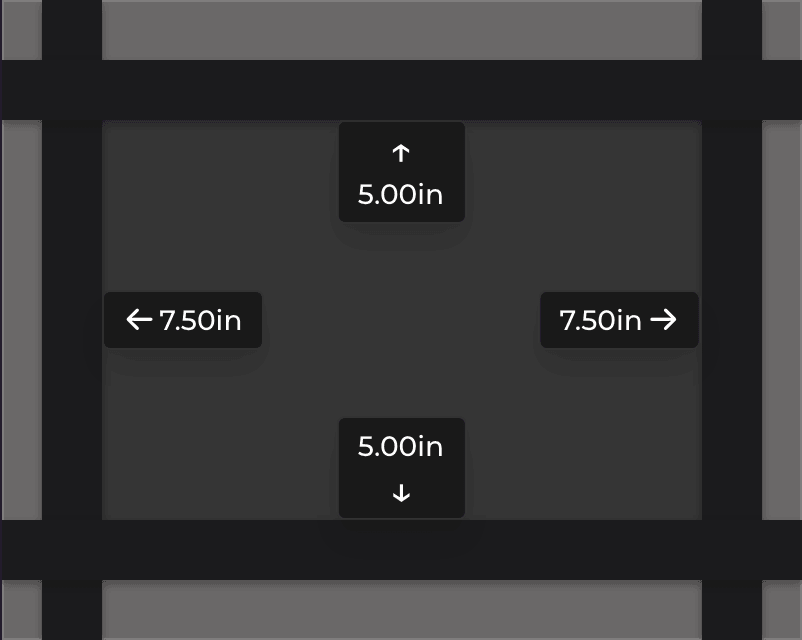
For example, if you are using 8x10" paper, and you set the minimum border width to 1", you will get left and right blades that are 8", but top and bottom blades that are 5.33".
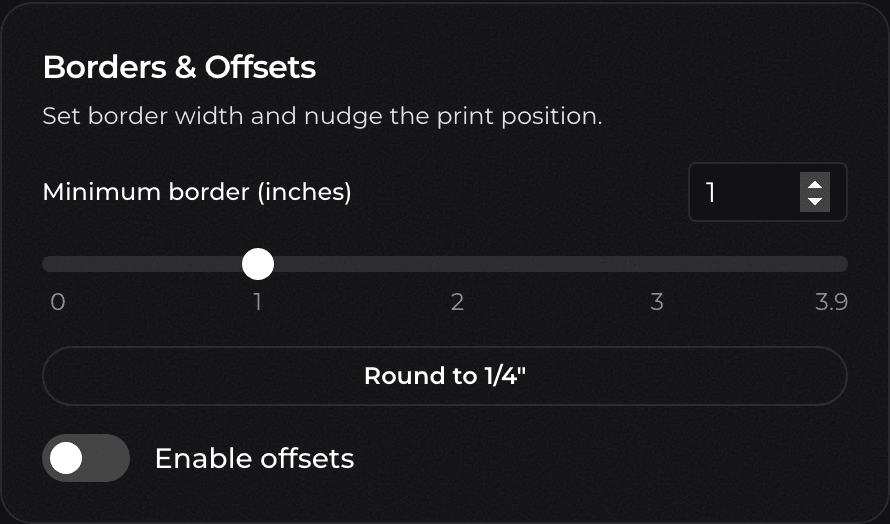
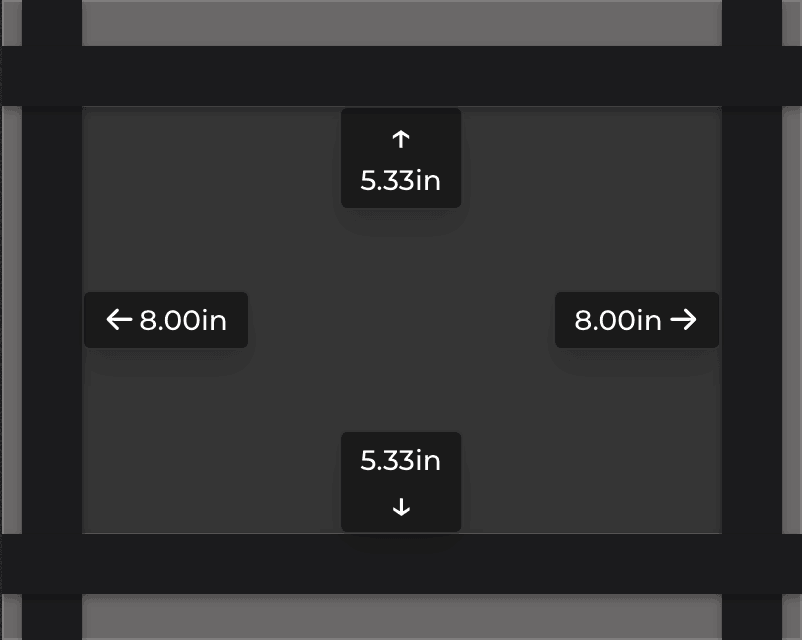
After clicking the button, you will see the minimum border setting updated to 1.25" and results update to to 7.5" for left and right blades, and 5" for top and bottom blades. The button will also go grey, indicating that those values can't be rounded down as they are already at the nearest quarter inch.
Custom Aspect Ratios
The calculator provides a variety of preset aspect ratios for common film negative sizes (for example, 2:3, for standard 35mm and 6x9 negative) sizes, as well as the ability to enter custom aspect ratios.
For example, if you want to print a 9:5 aspect ratio image, you can enter the following:
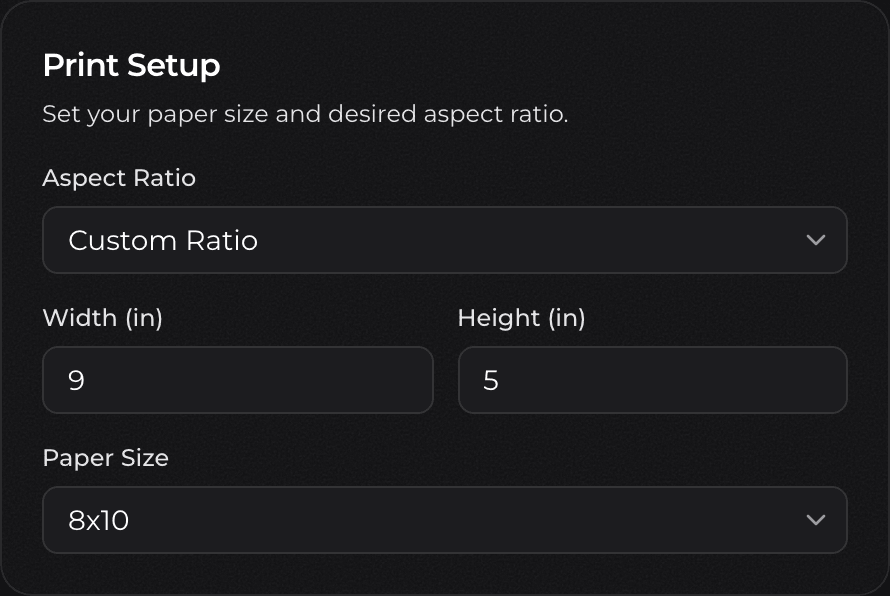
Which will create a blade positioning result like this, when the minimum border size is set to 1.63" (helpfully found by the quarter inch rounding button):